Integrating Booking Automation with YourWelcome
YourWelcome has always been a powerful tool to help your guests learn about your home and local area; but you can unlock a host of new opportunities by linking your account to BookingAutomation.


YourWelcome has always been a powerful tool to help your guests learn about your home and local area; but you can unlock a host of new opportunities by linking your account to BookingAutomation.
Before you can connect your BookingAutomation account to YourWelcome, you need to make changes to a few settings. In order to sync the accounts, there are two steps: create an account-level API key (16-digit key that YourWelcome will use to identify your BookingAutomation account), and to add a setting to each property to make it available.
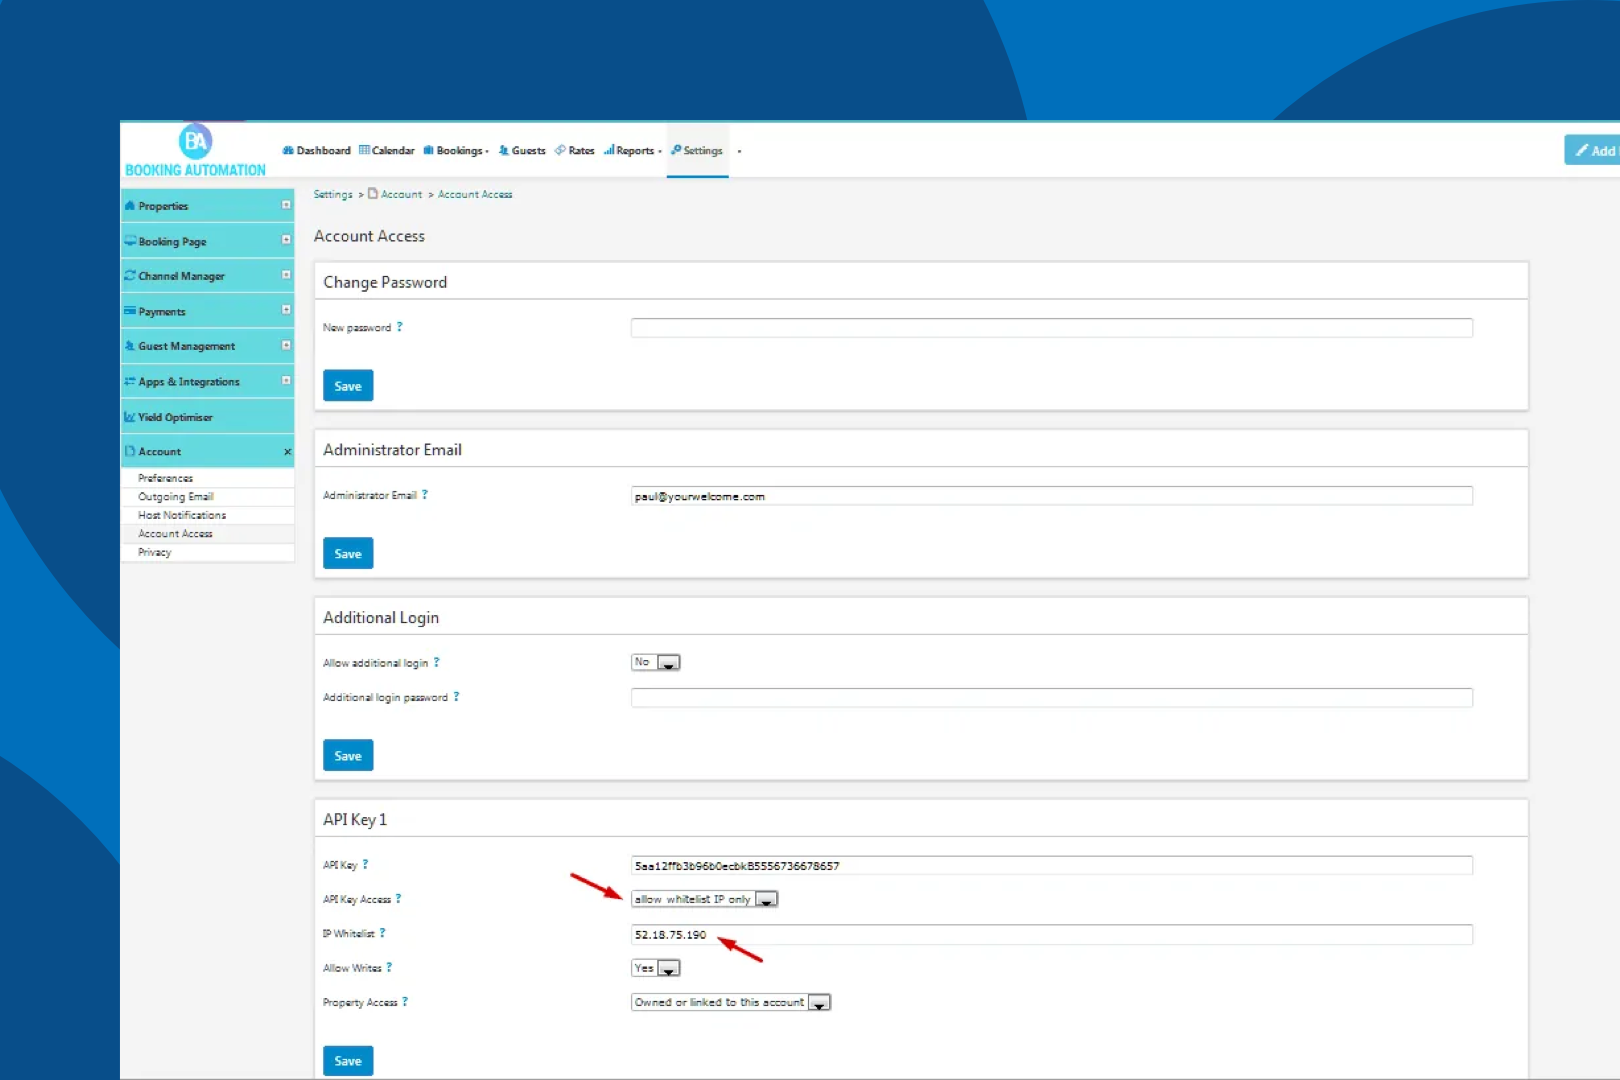
Go to the BookingAutomation site and log in. From the dashboard page, select “Account” from the left-hand menu and then “Account Access“.
Enter your password to proceed, then scroll down to one of the available API Key fields (see below). You need to create a 16-digit API key – this can be any combination of letters and numbers. Make note of the API key as you’ll need this later to connect your account to YourWelcome.
Note: You must set the API Key Access drop down to “Allow Whitelist IP only”, hit save and then a new field will appear called IP Whitelist. Enter the following IP Address in the IP Whitelist field: 52.18.75.190
For each property that you want to sync to YourWelcome, you need to add a property key in BookingAutomation.
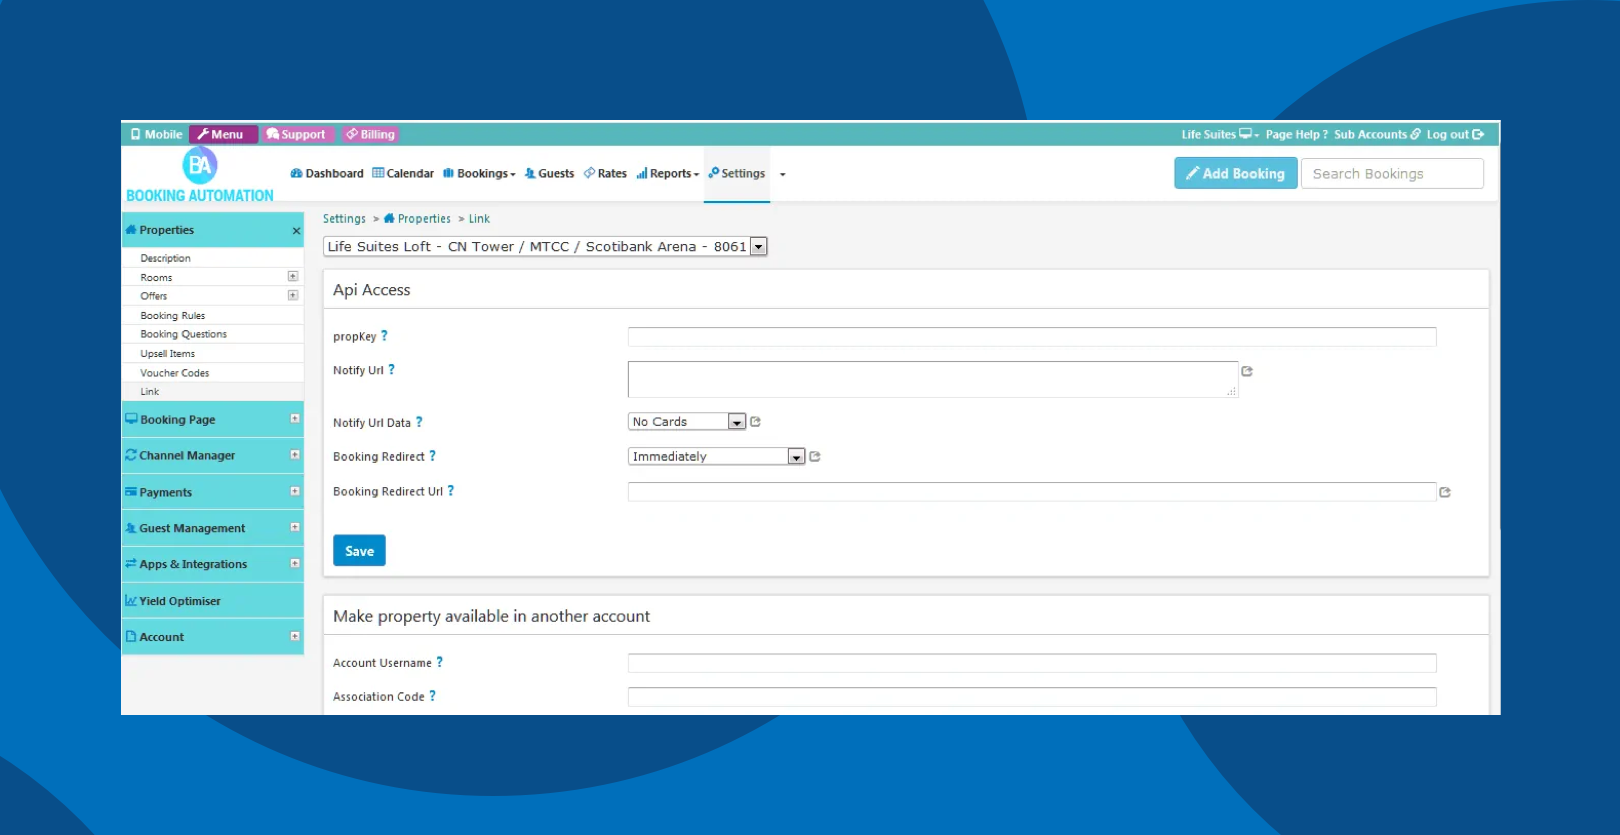
This is done by selecting “Properties” in the left-hand menu of the Booking Automation dashboard, then selecting the “Link” option.
From this page, you should select the property you want to link from the drop-down in the top left.
Once you’ve selected the property, you can set a 16-digit Property key (in the propKey field) – again, this can be any combination of letters and numbers. Once this is set, the property will appear within YourWelcome.
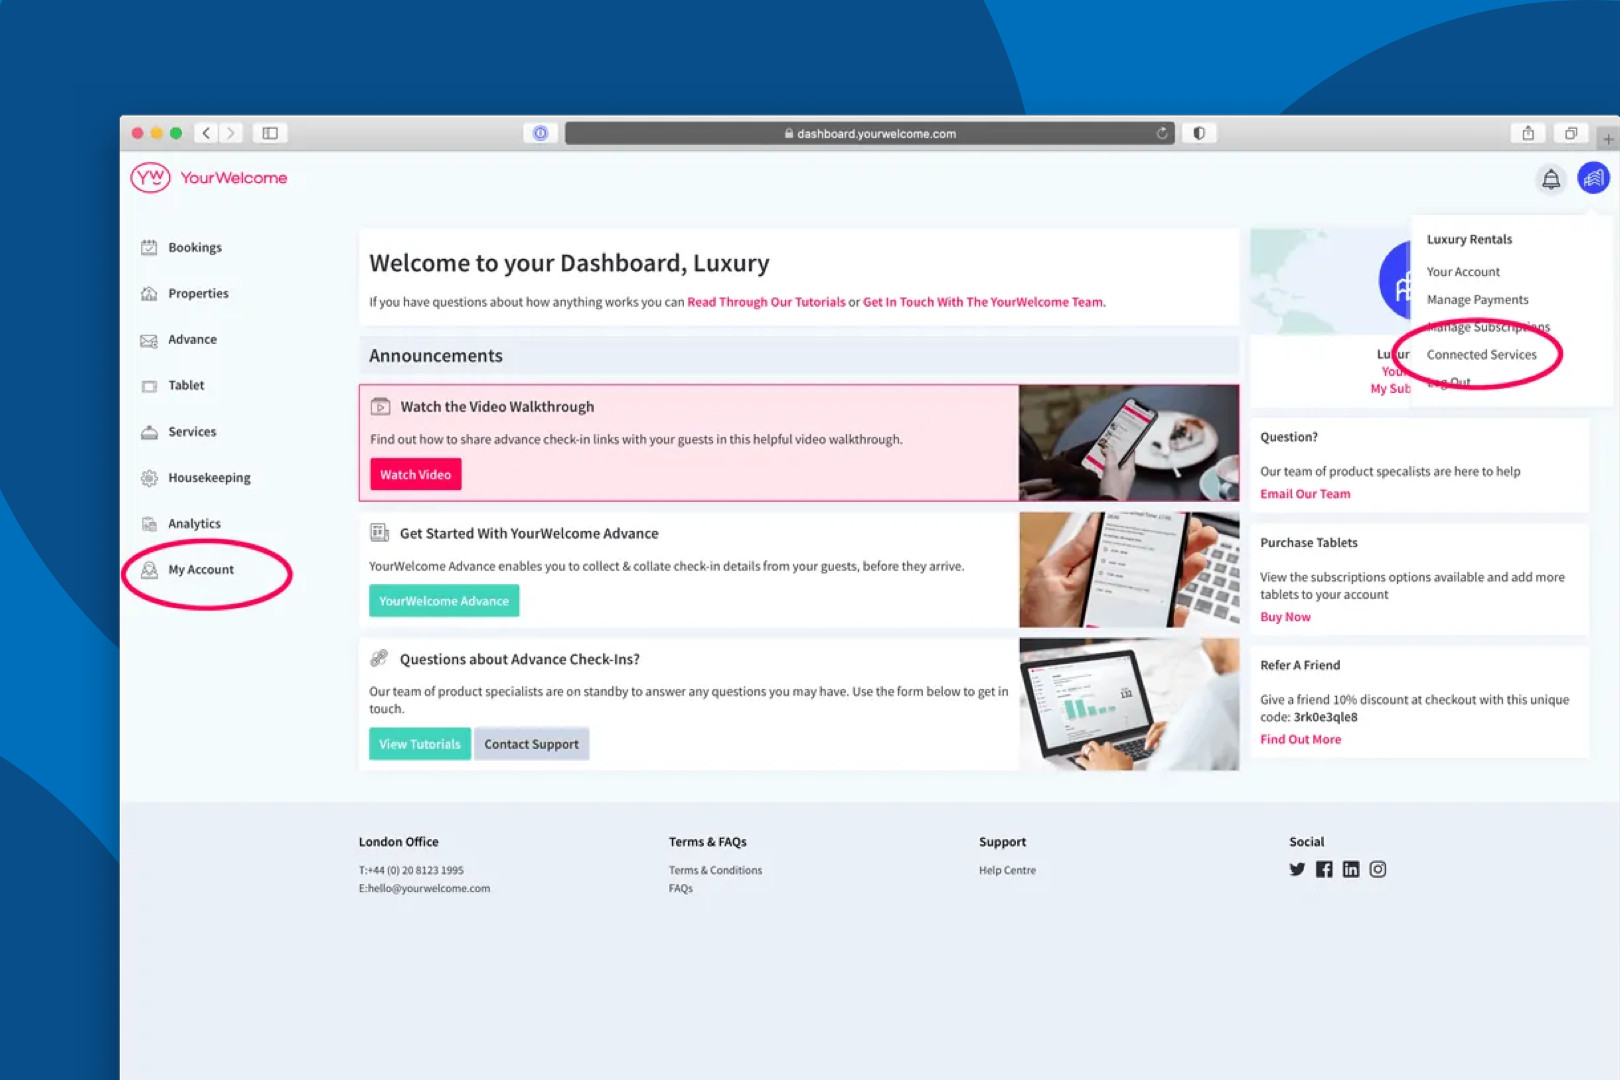
The first step of syncing your BookingAutomation properties to YourWelcome is to connect your accounts. Go to the Connected Accounts page YourWelcome dashboard and select BookingAutomation from the list.
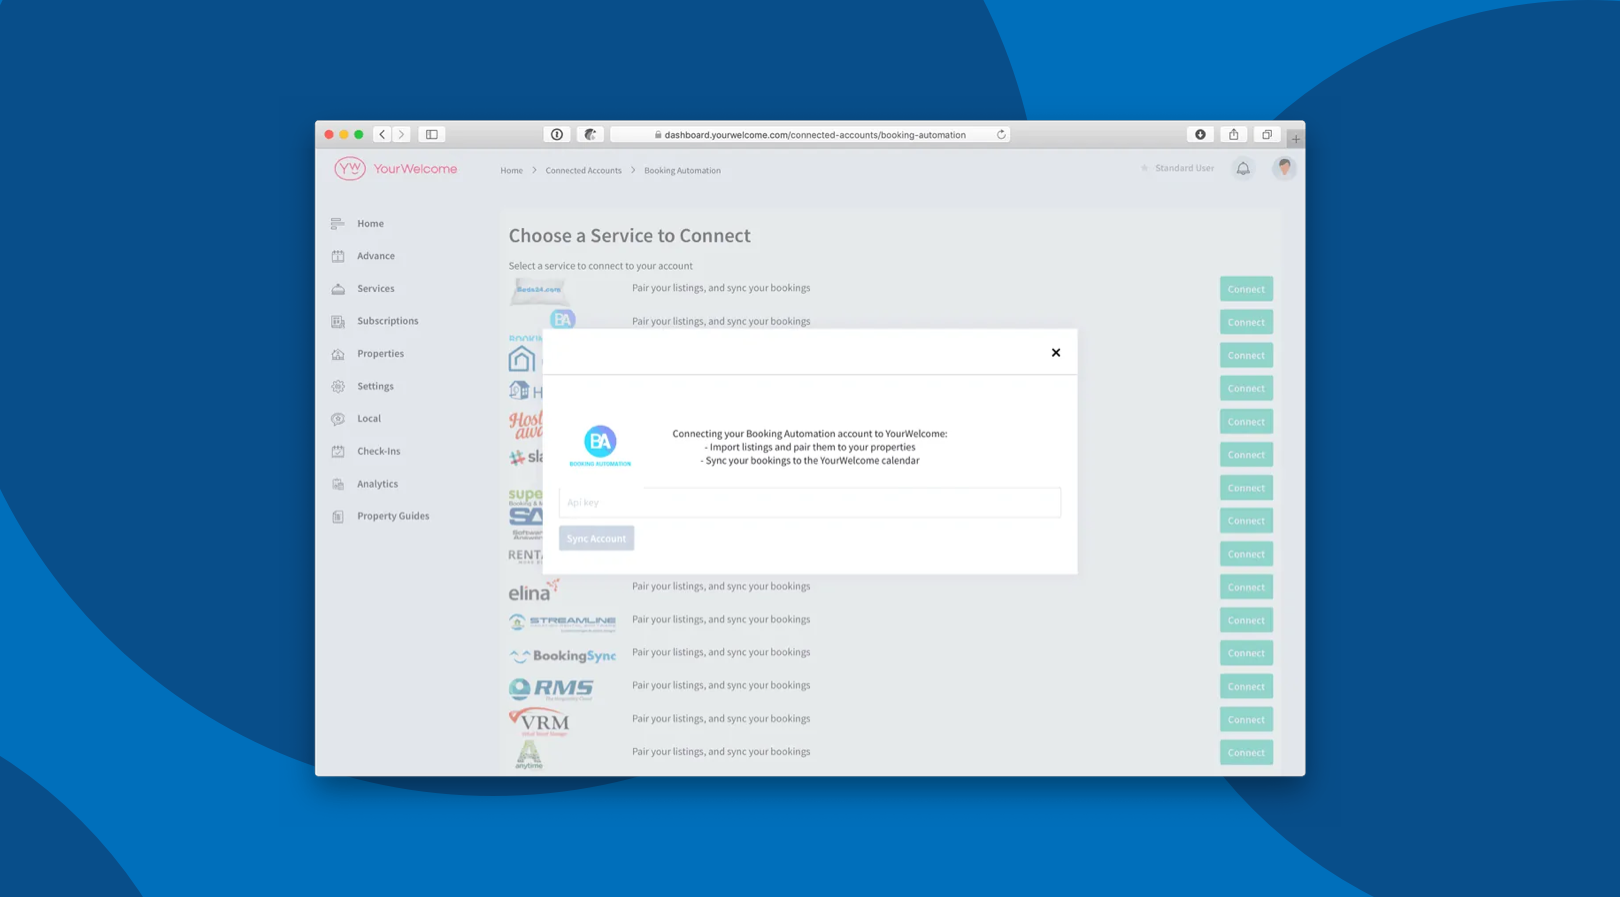
Find BookingSync in the list, then click “Connect”.
Retrieve your BookingAutomation Account API Key (that you set, above) and paste this into the field. If this is successful, the dialog box will change and a “manage” button should appear – this will allow you to manage the properties connected between both systems.
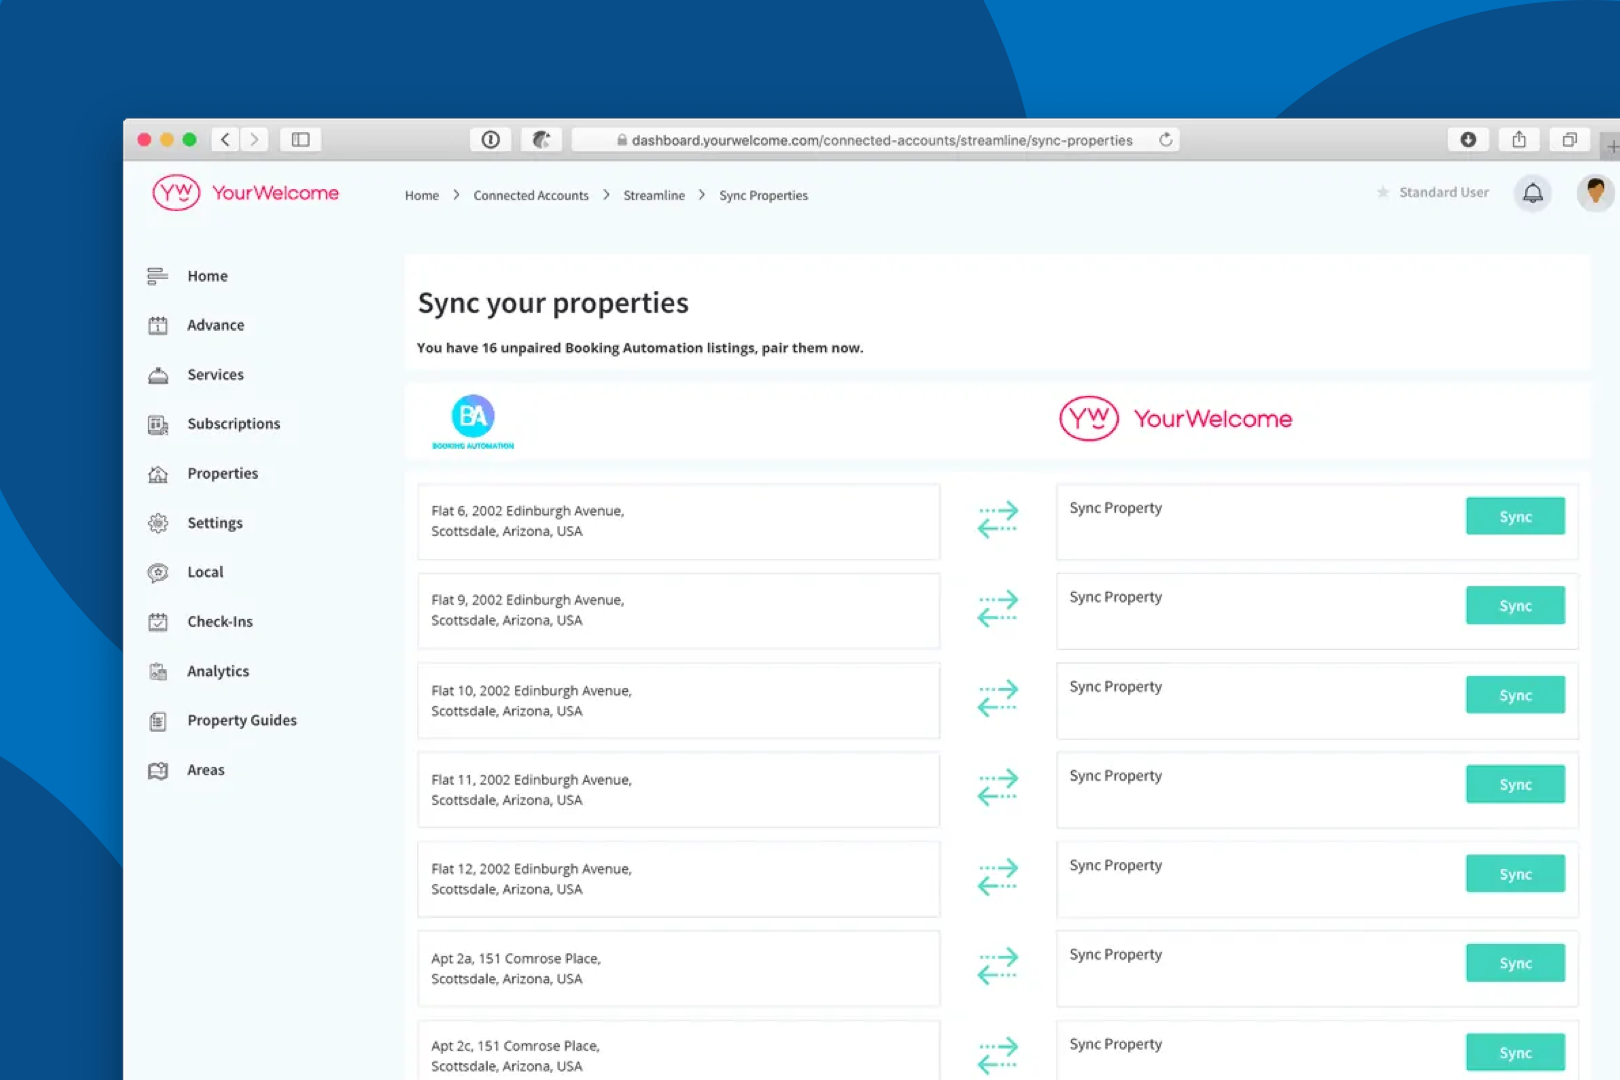
After clicking “manage”, you should be taken to the Sync Properties page. All of your BookingAutomation properties should appear in a list on the left-hand side, with the option to select & sync a YourWelcome property on the right. If your BookingAutomation properties are not showing, check that you have set a propKey (as per the above instructions).
Syncing a property is easy – select the BookingAutomation property you want to sync and select the “sync” button. You can then search for an existing property, or create a new property.
Once synced, all bookings will sync from BookingAutomation and be imported into the YourWelcome Calendar. When there is an upcoming booking, your tablets will welcome your guests by name.
That’s it, you’re all set. If you experience any issues with connecting your account please get in touch with your account manager or email support@yourwelcome.com