🗣 Want to view this article in a different language?

Connect & Enable Slack
In order to connect Slack to your account, you need to install the YourWelcome app from the Slack app store. You can search for this yourself in the Slack app directory, or follow the instructions below.
- Set up a Slack Workspace
- Go to the Connected Accounts page and connect to Slack
- Select a Workspace to install the Slack App to (Slack only allow 10 apps on free teams,
read more about this here) - You will be redirected back to the YourWelcome site and Slack is now connected to your account.
Setting Up Properties & Channels
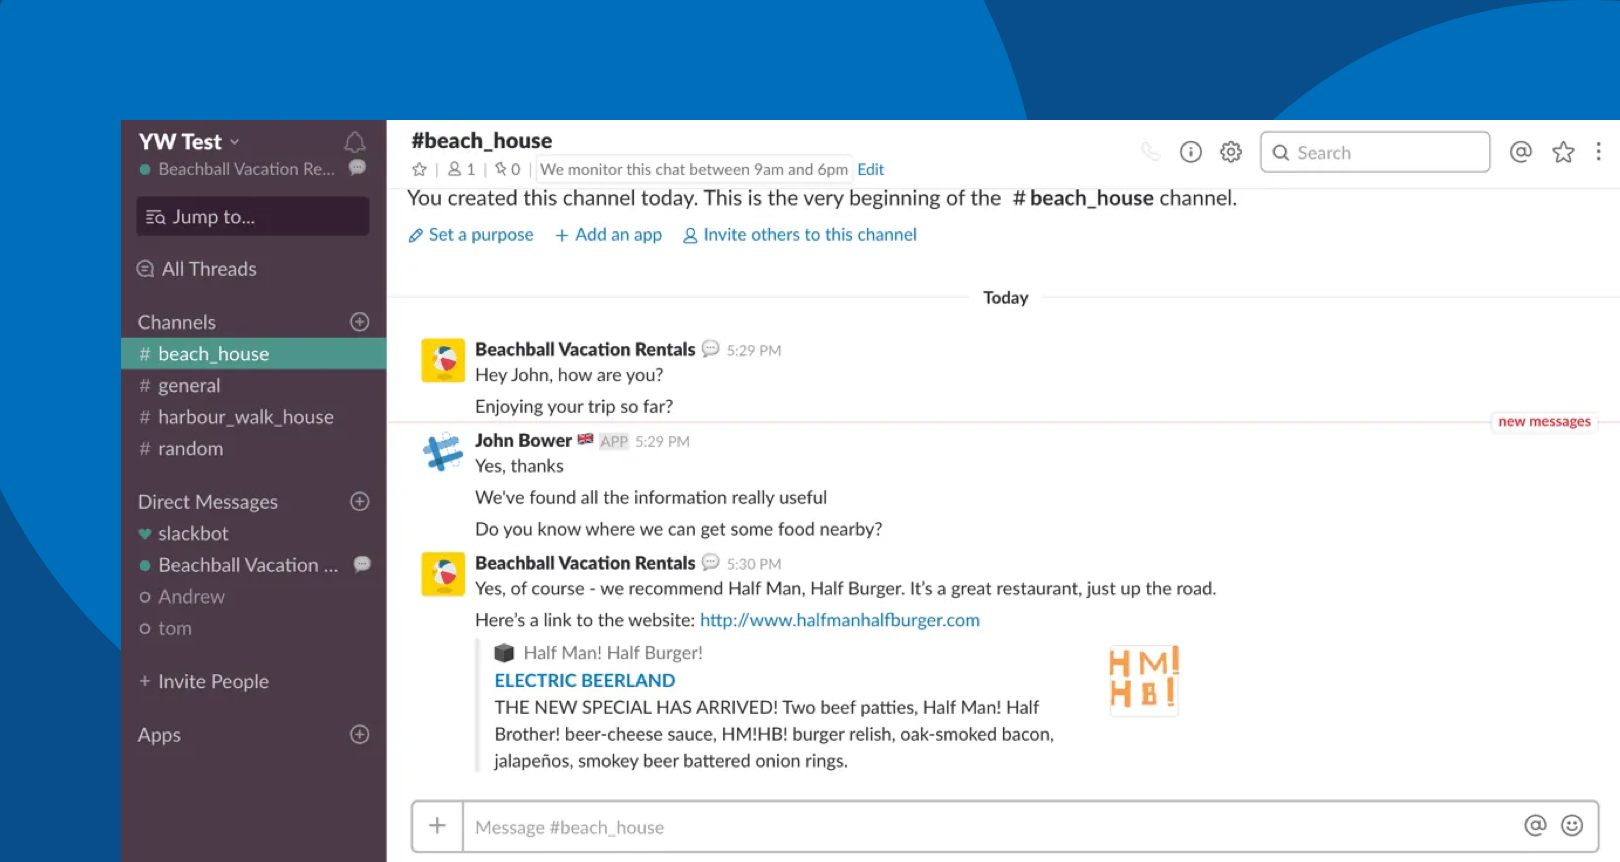
Slack uses channels to keep conversations separate.
Before they show up as channels, you will need to add a nickname to each of the properties that you want to communicate with. Your nicknames should be a maximum of 21 characters, as that’s the maximum length for a Slack channel name. Any nickname longer than 21 characters will be truncated (abbreviated) and might cause clashes with other similarly named properties.
The YourWelcome Slack app will automatically create a Slack channel for each of your properties, providing it has a nickname (which you can set when editing the address). Each channel is named using the nickname of the property – if you can see a channel in Slack, that property is now chat enabled.
Don’t worry – your nicknames and channel names are for internal use only and are not shown to your guests at any point. Please note that nicknames should be kept to a maximum of 21 characters, as if they are longer, Slack will abbreviate them and this may then clash with an abbreviated version from a similarly nicknamed property. Having 2 properties with the same nickname on Slack (because they have been automatically shortened for being over 21 characters) may then confuse Slack in to potentially sending messages to the wrong properties.
Channel Topic
You have limited options available to customise the channel, but we would recommend setting the “topic” to let your guests know the (local) hours between which you are monitoring chat (e.g. Office Hours: 9am-6pm).
What Your Guests Can See
Only messages that are sent between you and the guest during their booking – they can’t see any messages prior to their check-in.
- The name & profile photo of every team member that they receive a message from
- A visual indication of when you’re typing a response
- Guest name: This will use the name of the primary guest – what they entered when they checked in
- Guest language setting: This appears after the guest name as a flag emoji