
🗣 Want to view this article in a different language?

Adding custom fields from Supercontrol to YourWelcome
Our partnership with Supercontrol extends beyond just importing your basic booking info (properties, dates and guest details) and we can now sync important details that are useful for your turnovers to be used with the PropertyCare.com platform.
Data stored in the following fields in Supercontrol can now be synced over to the YourWelcome platform:
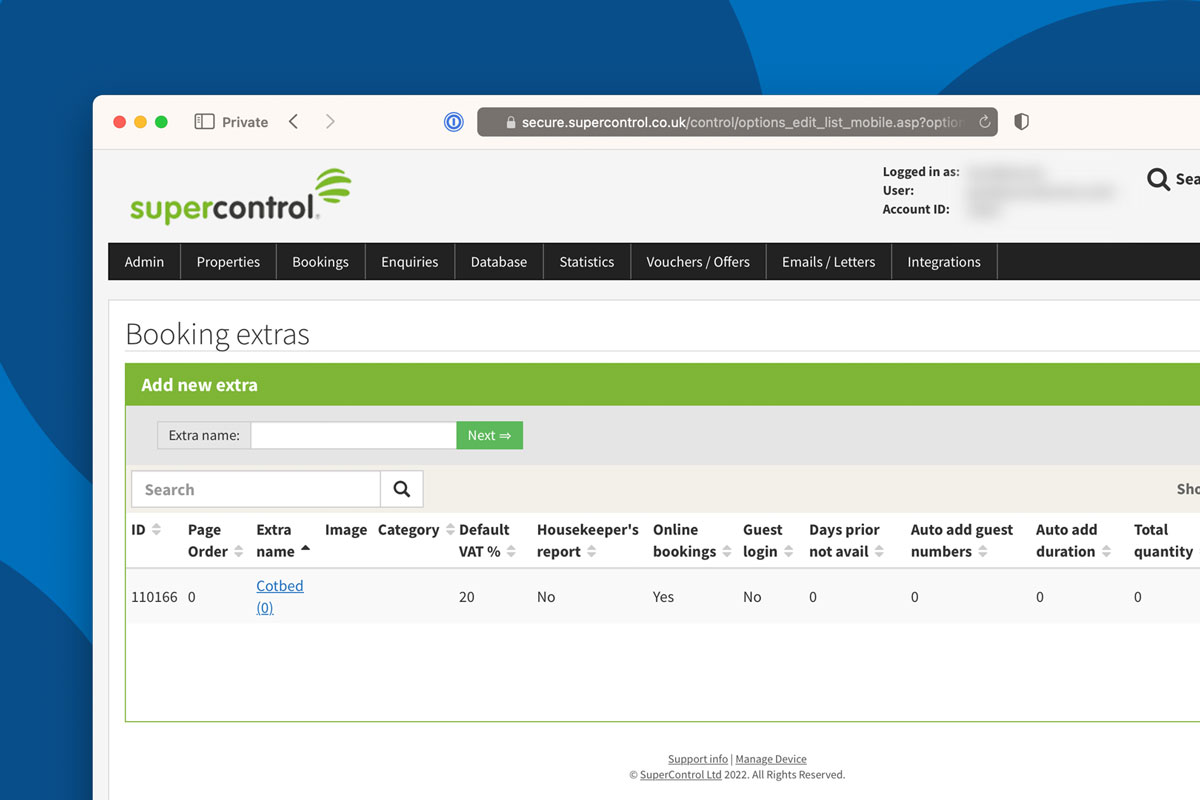
– Booking Extras
– Custom Form Items
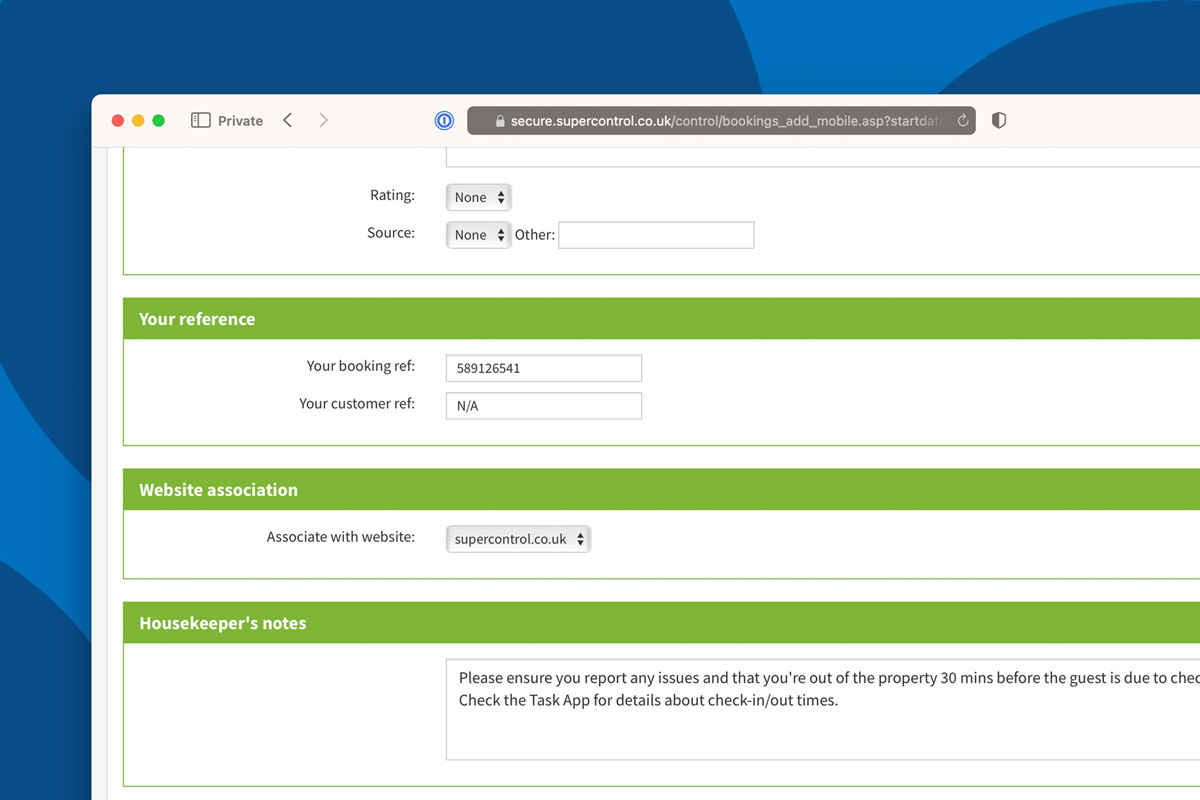
– Housekeeper Notes
This data can then be displayed on the tasks directly in your housekeepers PropertyCare.com app.
In this article we’ll learn how to achieve this.
Step 1 – Data in Supercontrol
First you’ll need to ensure you have the data in your Supercontrol account.
You can read more on Supercontrol’s help forum here:
Custom questions:
https://help.supercontrol.co.uk/m/getting-started/l/1573966-booking-and-enquiry-form-fields-how-do-i-set-up-unique-questions-for-my-booking-form
Housekeeper notes:
https://help.supercontrol.co.uk/m/using-supercontrol/l/1353917-adding-editing-housekeeper-notes
Booking extras:
https://help.supercontrol.co.uk/m/using-supercontrol/l/631631-how-do-i-add-edit-and-remove-my-booking-extras
Step 2 – Creating Custom Fields
Once you know which of those fields you are planning to sync to the YourWelcome platform you must first create a custom field for each of these items in the YourWelcome dashboard that we’ll then use to pair with those fields. These fields will act like containers on each booking to receive the data from Supercontrol.
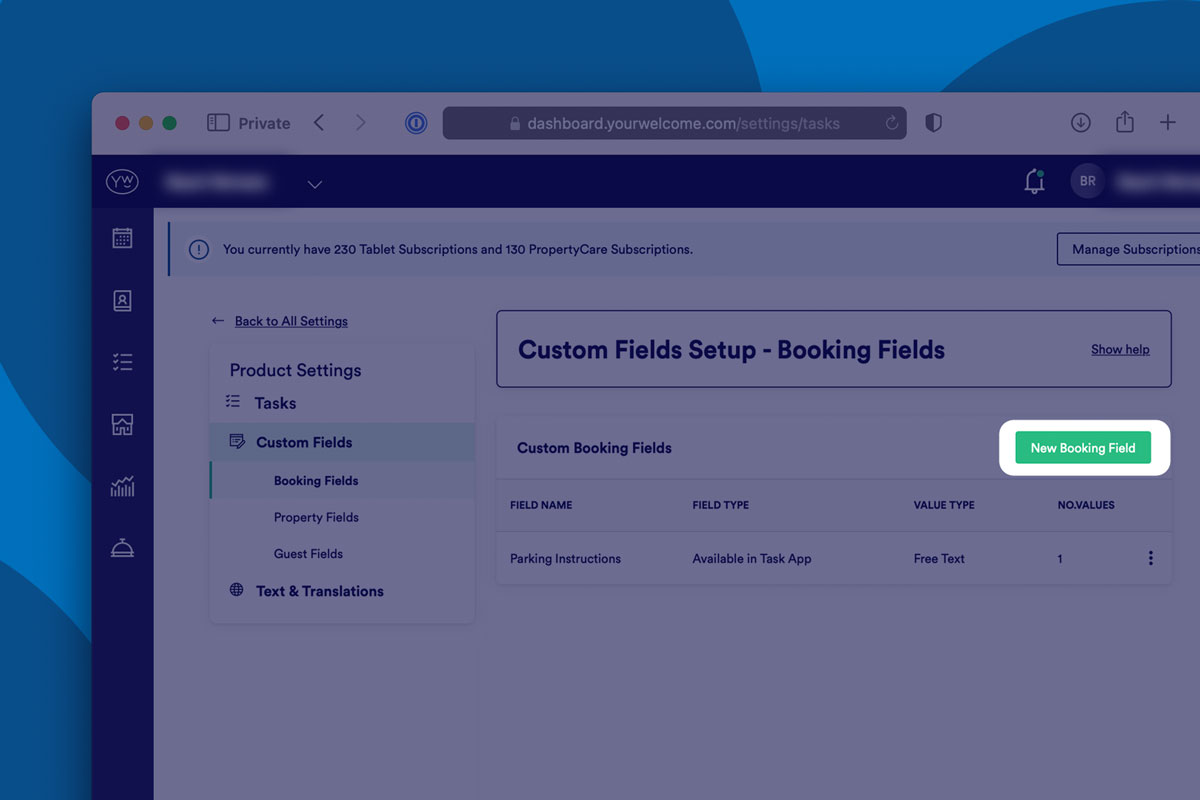
When you’re ready to dive in, visit Settings > Custom Fields :
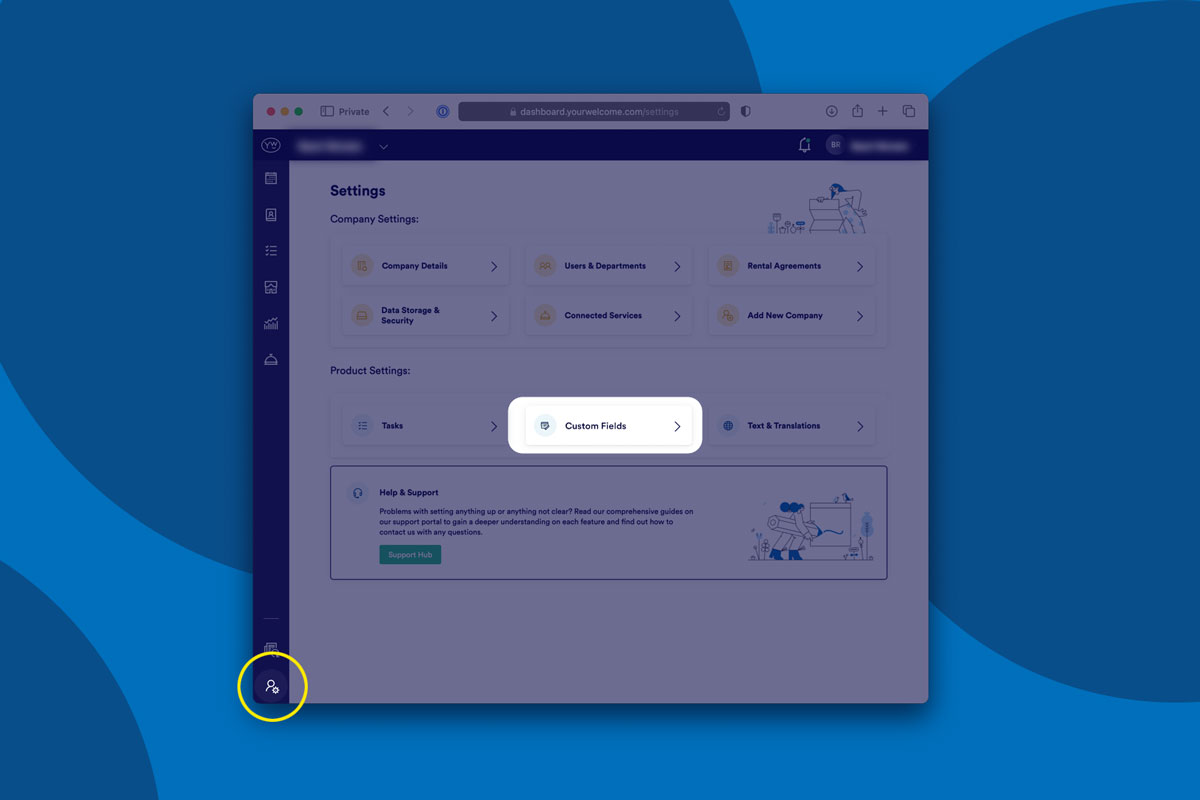
The fields that you’ll want to create are Custom Booking Fields (this is the default type when selecting Custom Fields however as we also offer Custom Guest Fields and Custom Property Fields, its best to ensure the Booking fields option is highlighted from the side bar menu to ensure the fields are not stored on guest profiles or property pages).
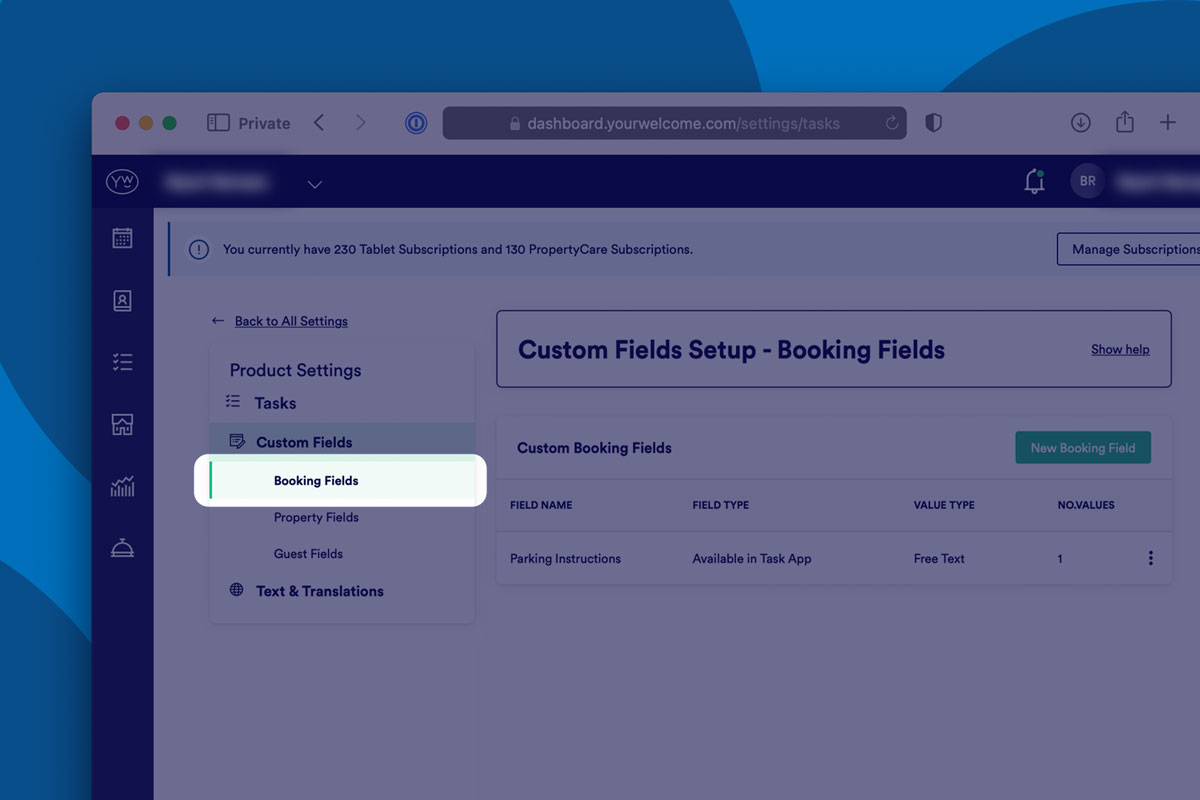
Select the ‘New Booking Field’ button to create the field.
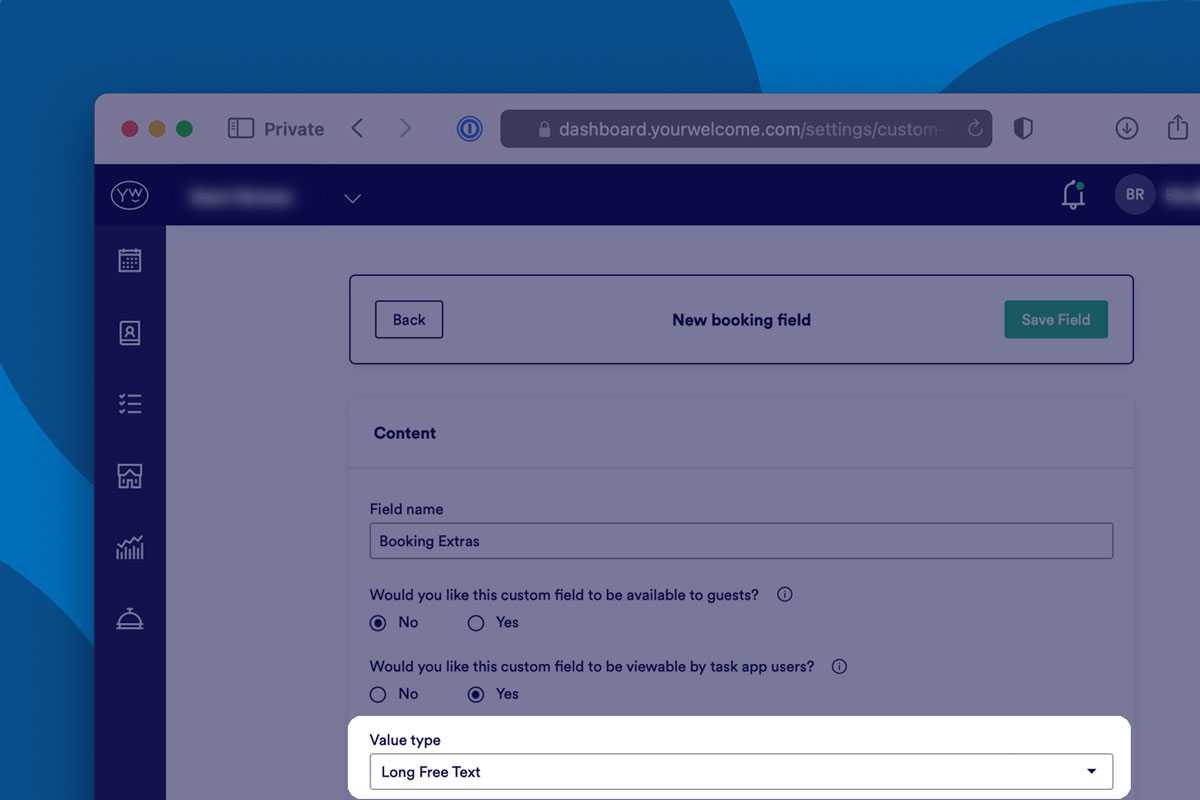
Next give the field a name – for ease you may want to use the same name as used in Supercontrol (eg Booking Extras) however you can choose something else in our platform if wanted:
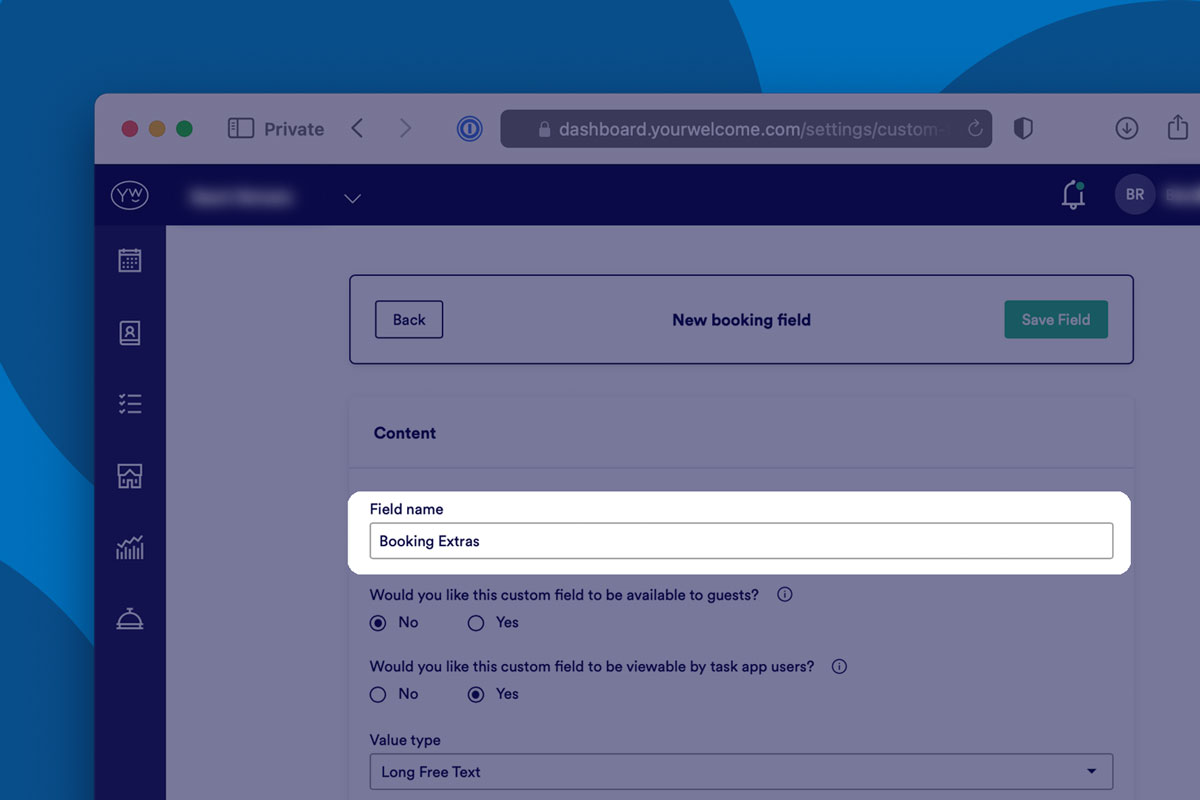
Its worth nothing the name of this field will be displayed in both the task app AND each individual booking page of the dashboard so it should be something appropriate that your housekeepers and admin staff will understand.
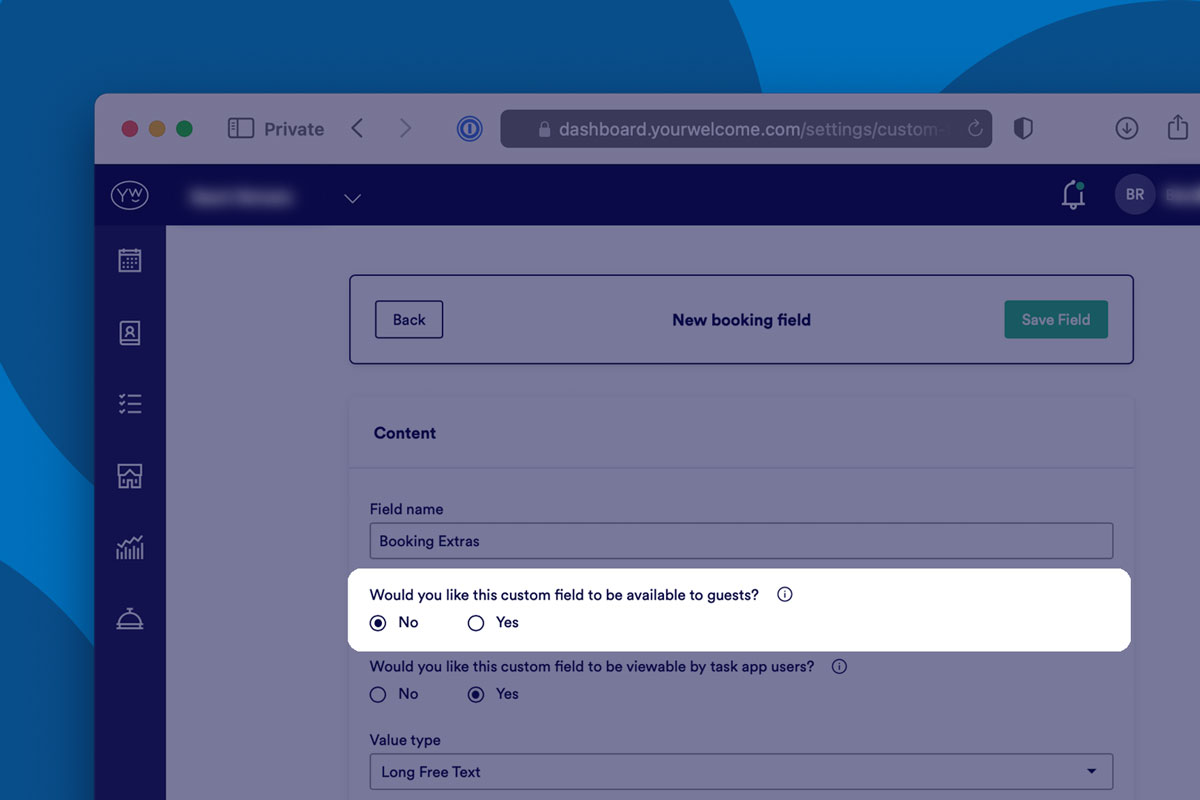
As YourWelcome Custom Fields can be used in GuestGuides.com tools as well as on YourWelcome Tablets you can ignore the question regarding displaying the field to your guests and leave this set to ’No’.
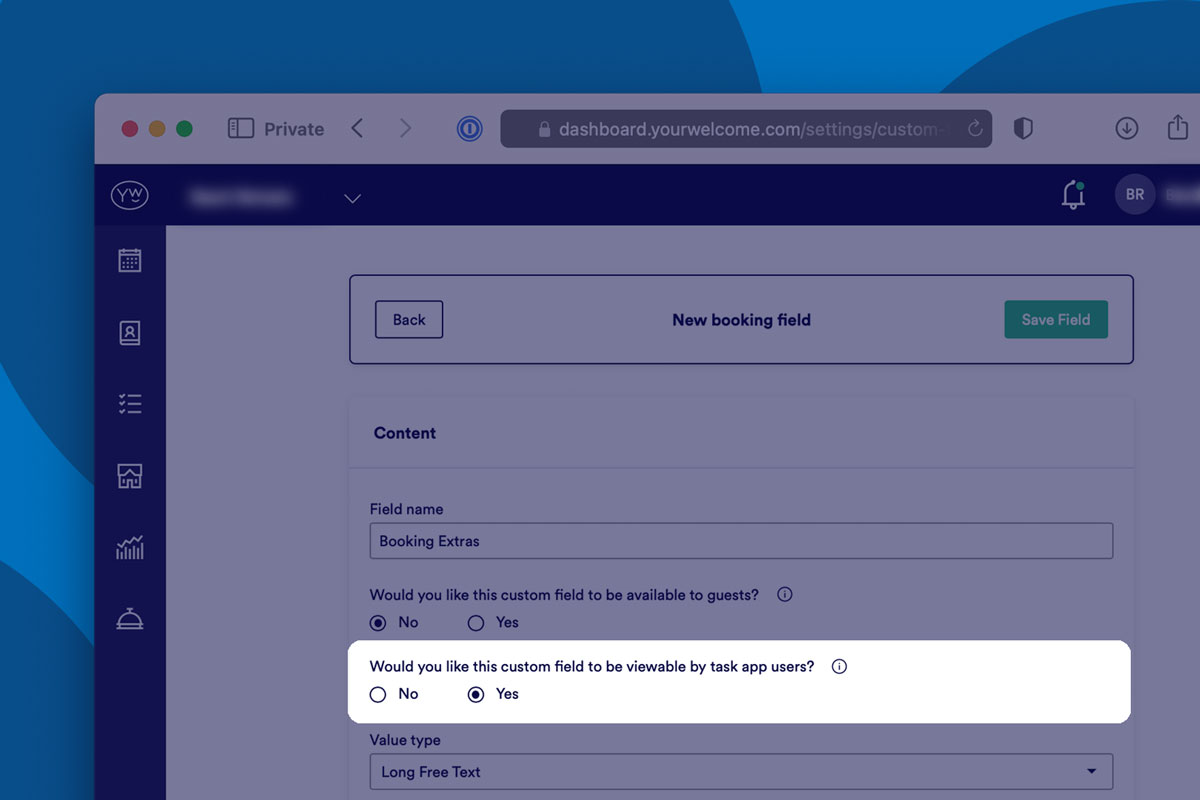
Assuming you intend to display this to your housekeepers, inspectors and maintenance team users, you must set this new Custom Field to be viewable by Task App users. Simply select YES.
The Value Type for this new field should be set to ‘Long Free Text’ as this type can contain any kind of information – restricting it to any other single kind (ie Yes/No or a Date) will still allow the field to import from Supercontrol but will error out if you attempt to edit anything later. The most flexible option is ‘Long Free Text’.
Once saved you’ll be taken to the new field’s summary page. As with all Custom Fields you can set a default however we recommend leaving this as blank and simply hitting ‘Back’ to return to the Custom Fields menu.
These custom fields will act as containers and import the data set on Supercontrol in to them. Once all your custom fields are added you’re ready to move on to step 3.
Step 3 – Pairing Fields
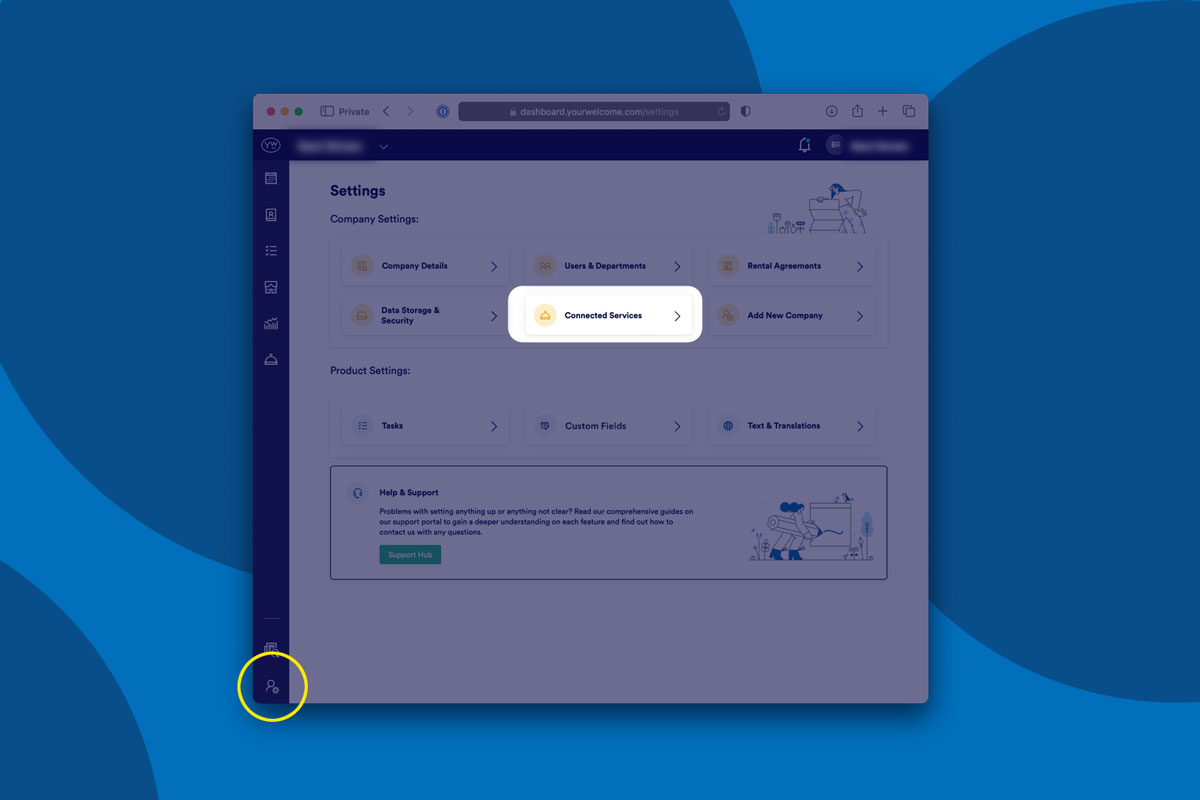
The next step is to pair the fields from Supercontrol with your new purpose built Custom Fields. To do this we need to head back to the Connected Services page in the YourWelcome Dashboard. This can be found under the Settings > Company Settings section or by clicking here:
We’re assuming you’ve already paired Supercontrol for this step however if you’re just starting out then you’ll need to read our integration guide to get that connected first.
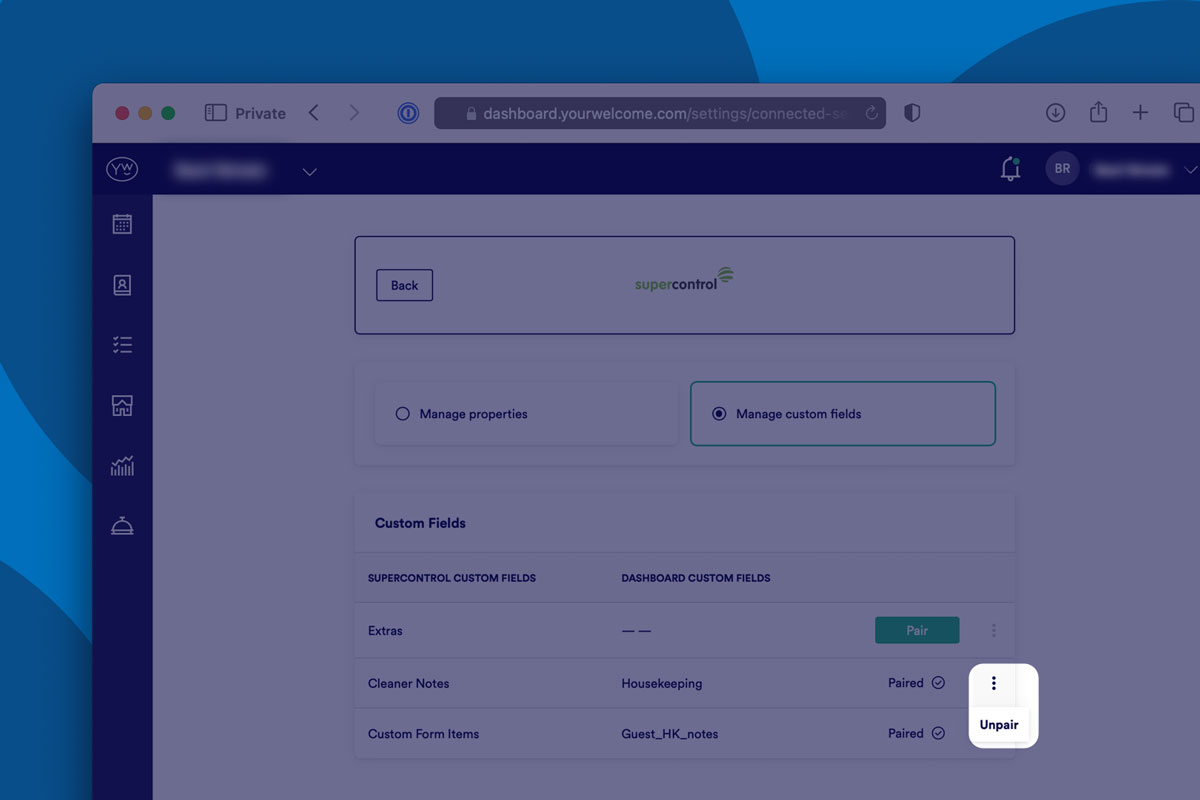
To pair the fields simply click the ‘Manage’ button next to Supercontrol under the ‘My Connected Services’ section.

The default tab when managing is to ‘Manage Properties’ however for this step simply switch to ‘Manage Custom Fields’.
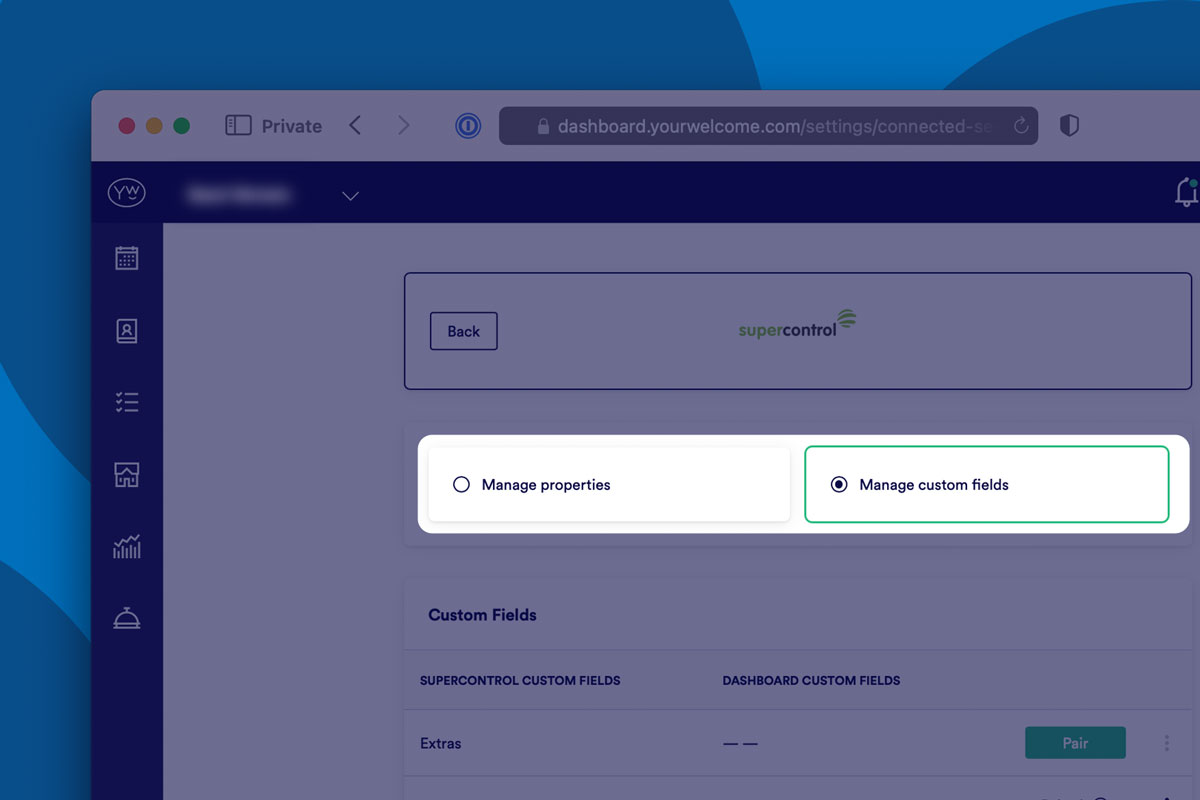
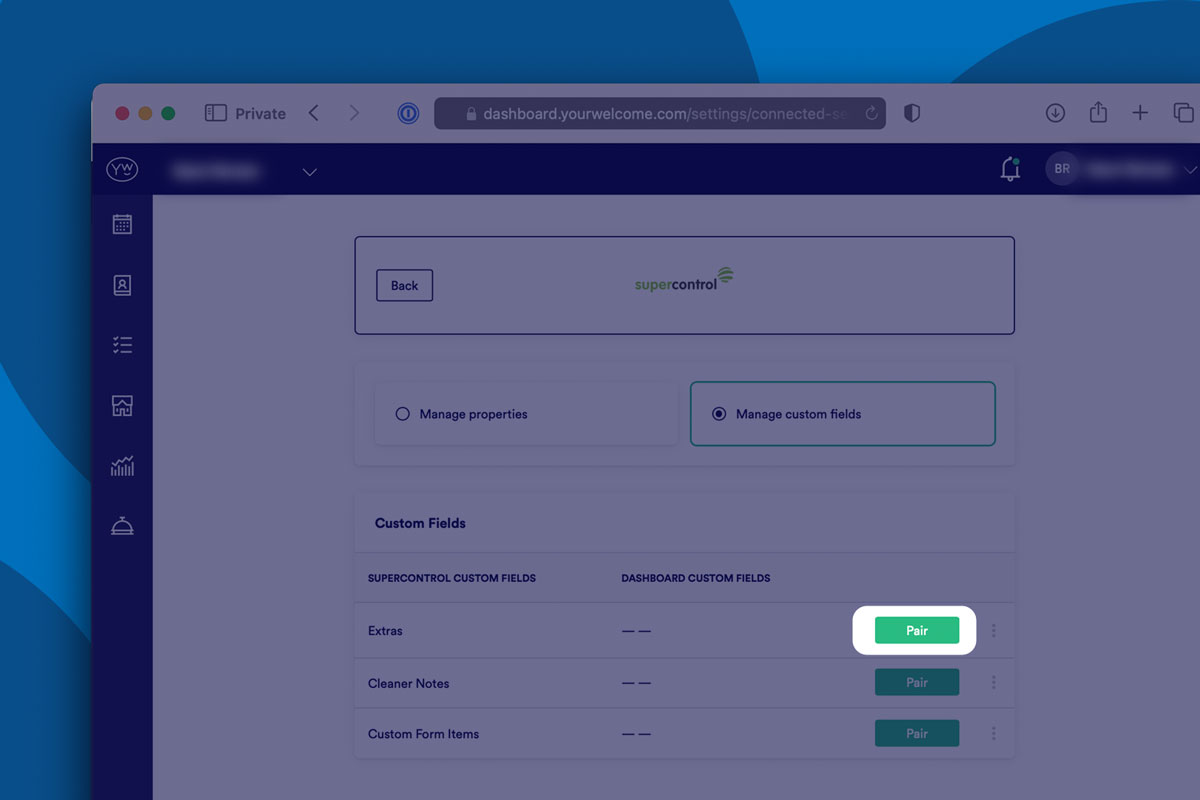
From here you’ll see the table contains the 3 fields discussed in Step 1.
Choose the first row you’d like to pair and select the green ‘Pair’ button.
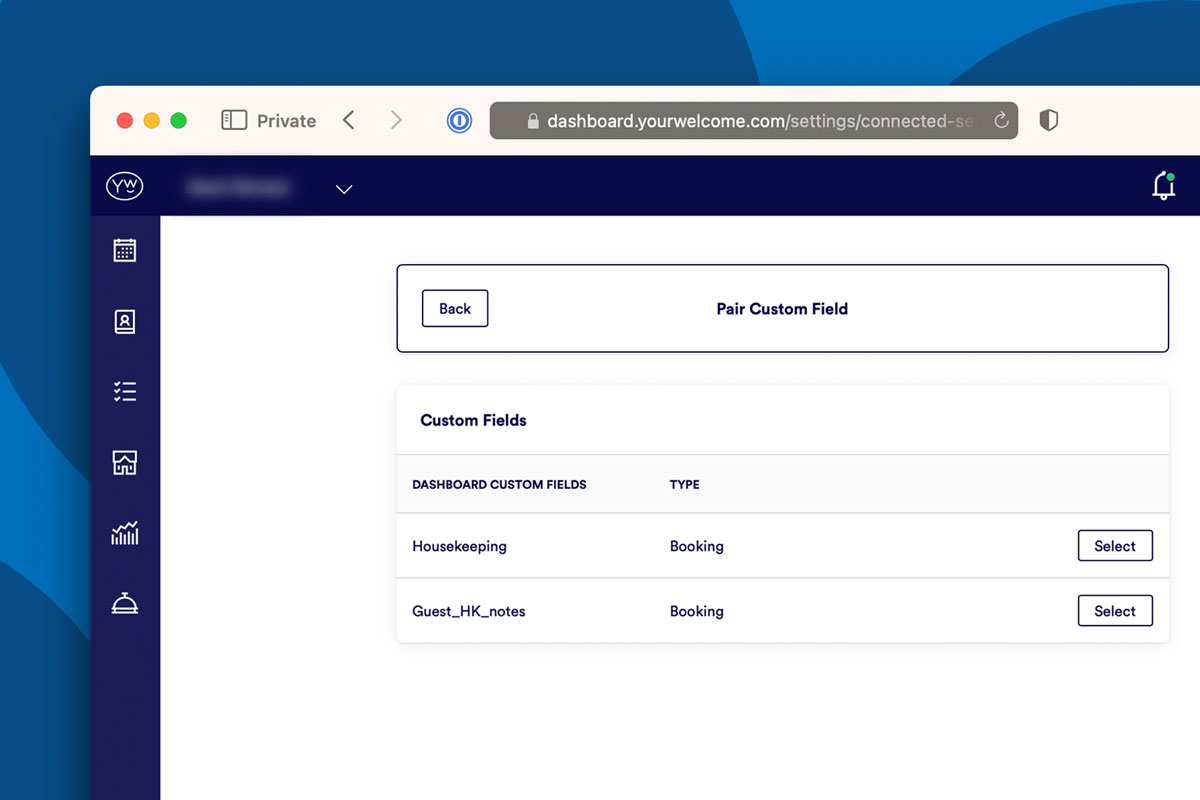
If you have not yet set up your Custom Fields (as per Step 2) you will see a screen telling you that you have no custom fields available to pair with. However assuming you have, you will see a list of all of your available Custom Fields.
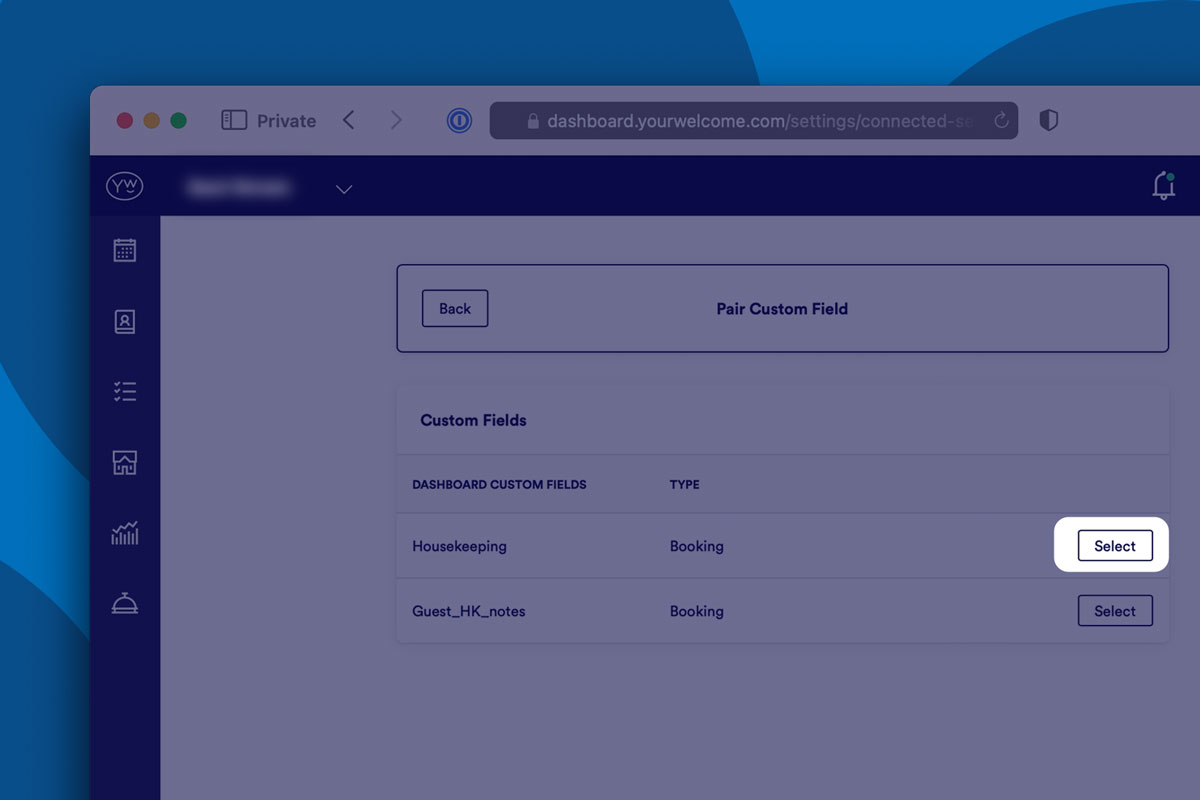
Note this is not just the items created in Step 2 but may include other custom fields created by yourself or other users with admin dashboard access who have created fields. Ensure you are selecting the correct field (as once paired it will overwrite any existing data with the info synced over from Supercontrol).
Remember in Step 2 you may have chosen to name the field in YourWelcome’s dashboard something different to what it is called in Supercontrol so you are not necessarily looking to pair identically named items. You can always double check and come back to pair later!
When you’re confident you have the correct field just click the ‘Select’ button (and then Sync Field from the confirmation pop-up).
To remove a pairing simply select the ‘more’ menu (3 dots) to the right of the ‘Paired’ sign. Note removing a pairing will stop future syncs from happening but will not remove any previously synced data.
Step 4 – Enabling the fields in your tasks
The final step in this process is to define which of your tasks the custom fields should be shown on. By now we assume you understand how to add/edit repeating tasks or individual task templates. You can read more about creating tasks here.
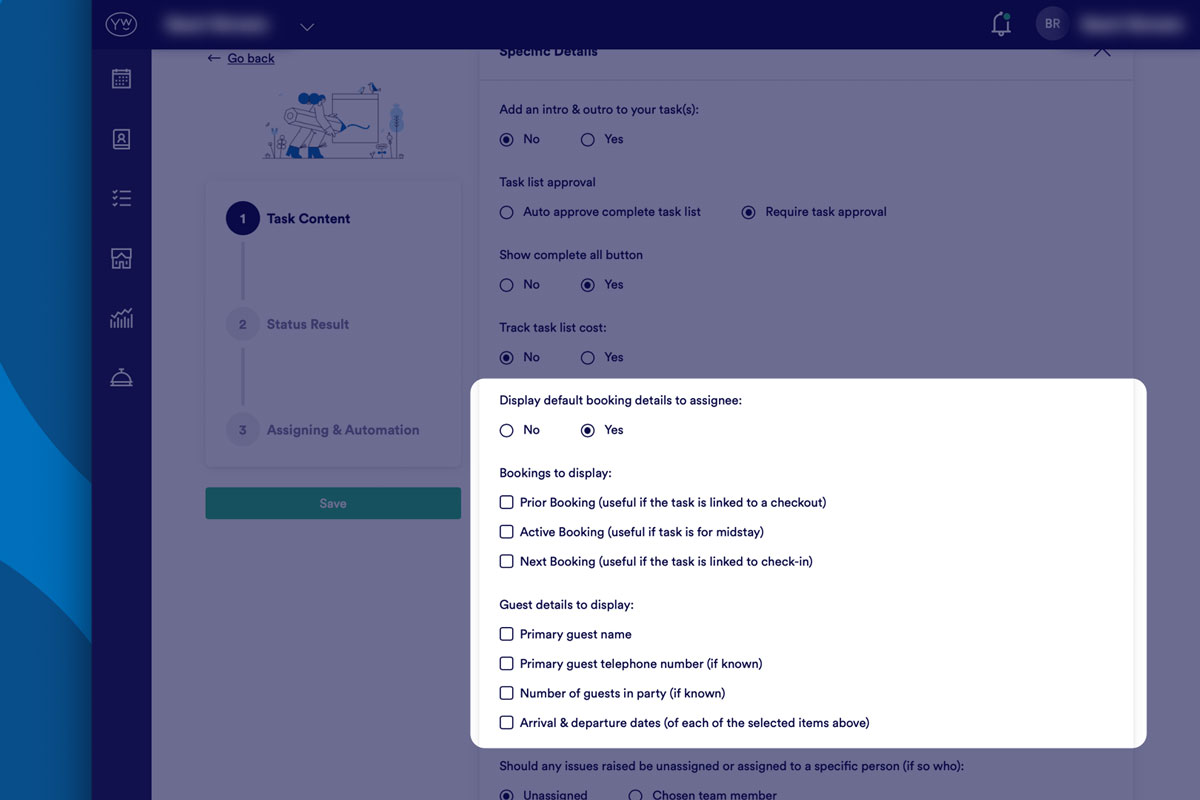
Enabling the custom fields is very simple, within the Task Content section of any task creation process there is a ’Specific Details’ section which when expanded includes the statement:
Display default booking details or custom fields to assignee

Simply set this option to Yes.
(Note: by opting to display this there are additional (optional) default fields that can be configured to be shown – these are unrelated to your custom fields).
Click save and you’re done.
Once you’ve updated this option on all the tasks you wish to display custom fields on, the process is complete.
Step 5 – Verifying the data
YourWelcome syncs with Supercontrol every 20 minutes, so there may be a lag between pairing your fields and seeing the data in the YourWelcome dashboard.
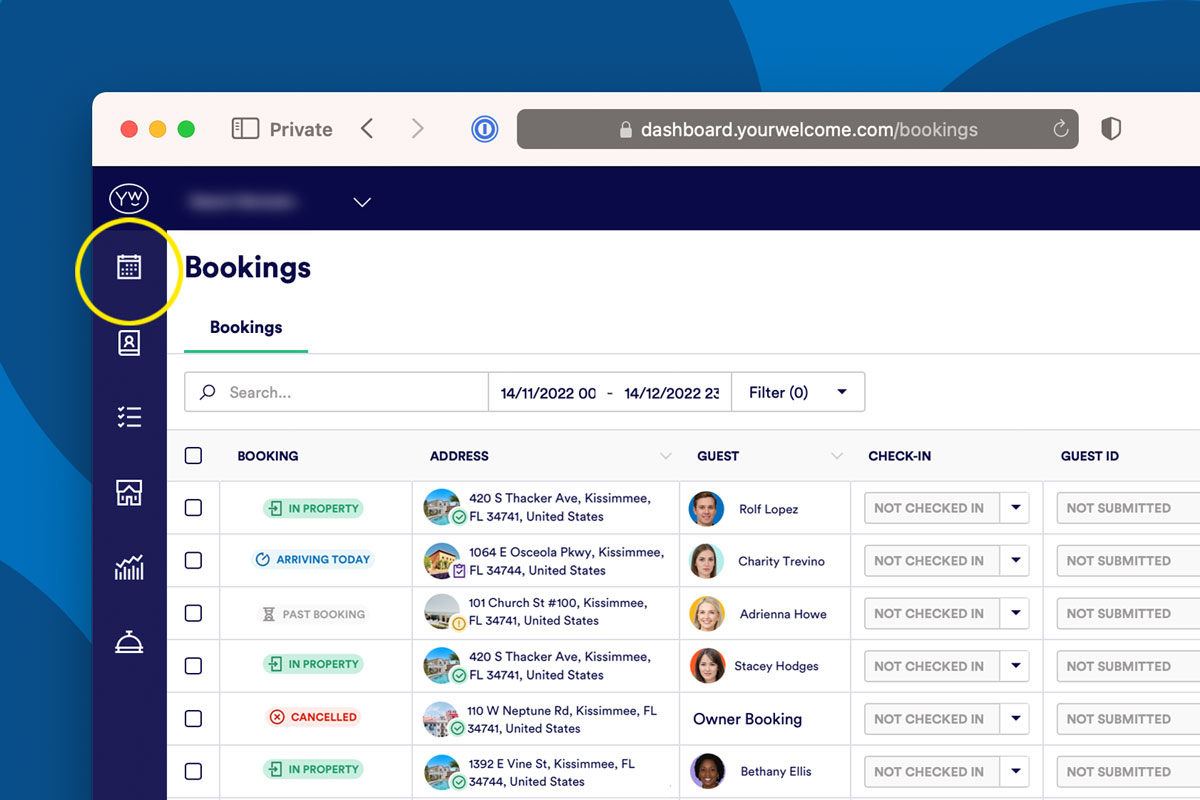
To view the data to ensure its flowing in, you can visit an individual booking page in the YourWelcome dashboard where you would expect to see the paired fields. Bookings can be found from the main Bookings section of the dashboard:
When selecting an individual booking you can scroll to the bottom to see all Custom Fields. In that section you should see data blocks labelled the same as the custom field name. These blocks should contain the data pulled over from Supercontrol.
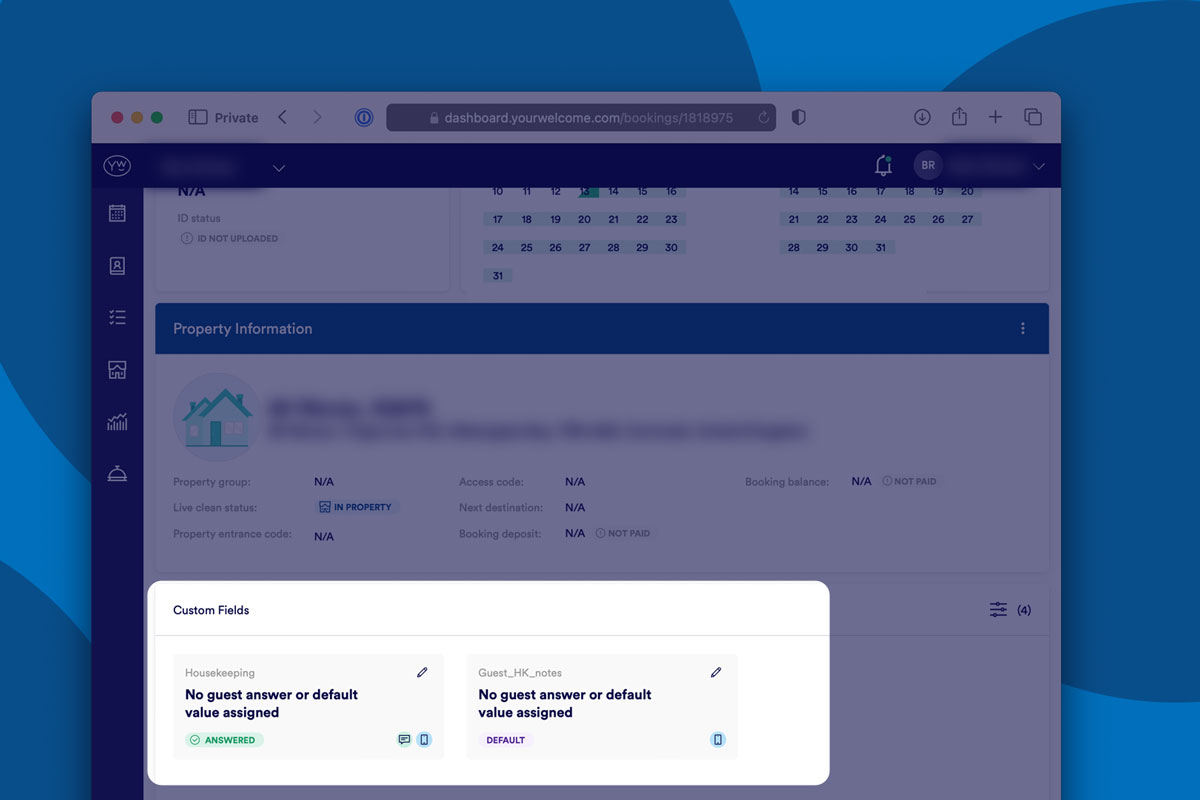
You can edit the data by clicking the pencil icon but remember whatever is set here is what will be displayed in your assignee’s task app. Please also note, we do not ‘write back’ to Supercontrol so any updates made here will not be reflected in Supercontrol – where possible we recommend updating in Supercontrol and then waiting for the update to sync over to the YourWelcome dashboard (every 20 mins) to ensure both platforms are in sync.
What your assignee will see.
We have assumed you’re familiar with the task app however you can read about how to use and navigate the Task App in more detail here.
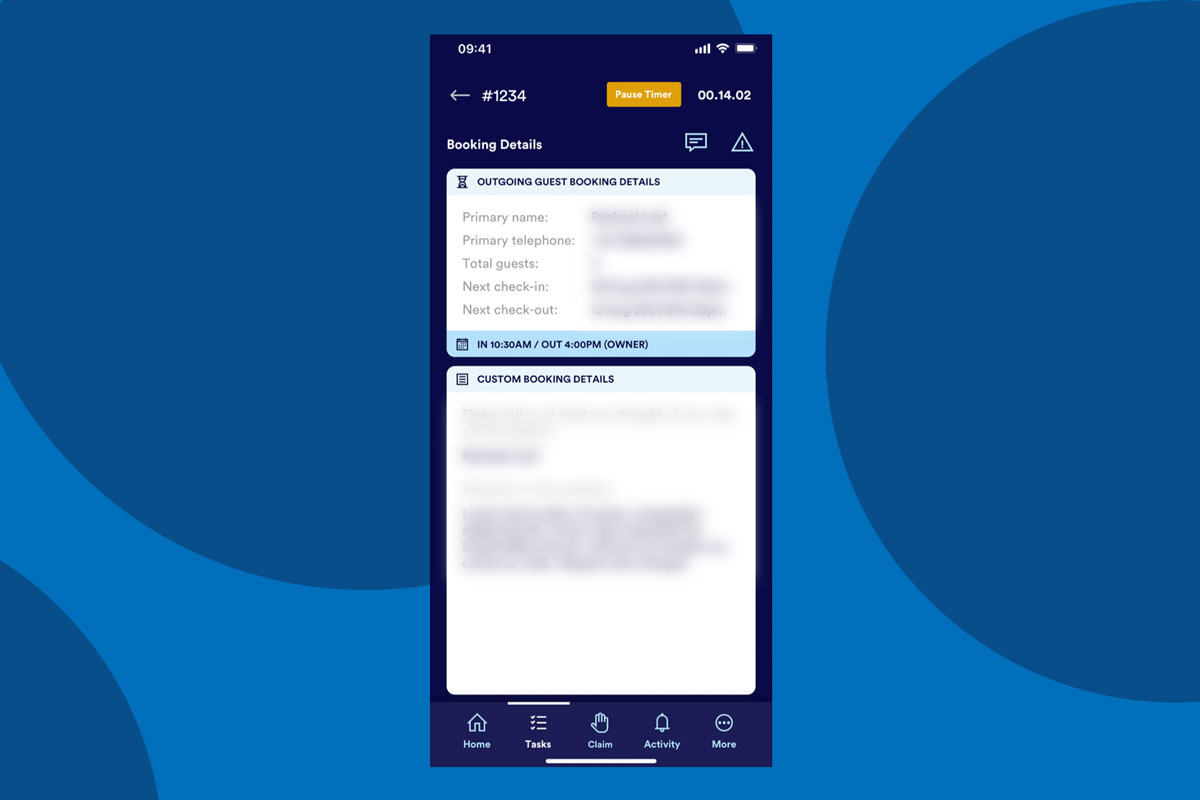
Each task with custom fields set to display (see step 4) will have an additional button like this:
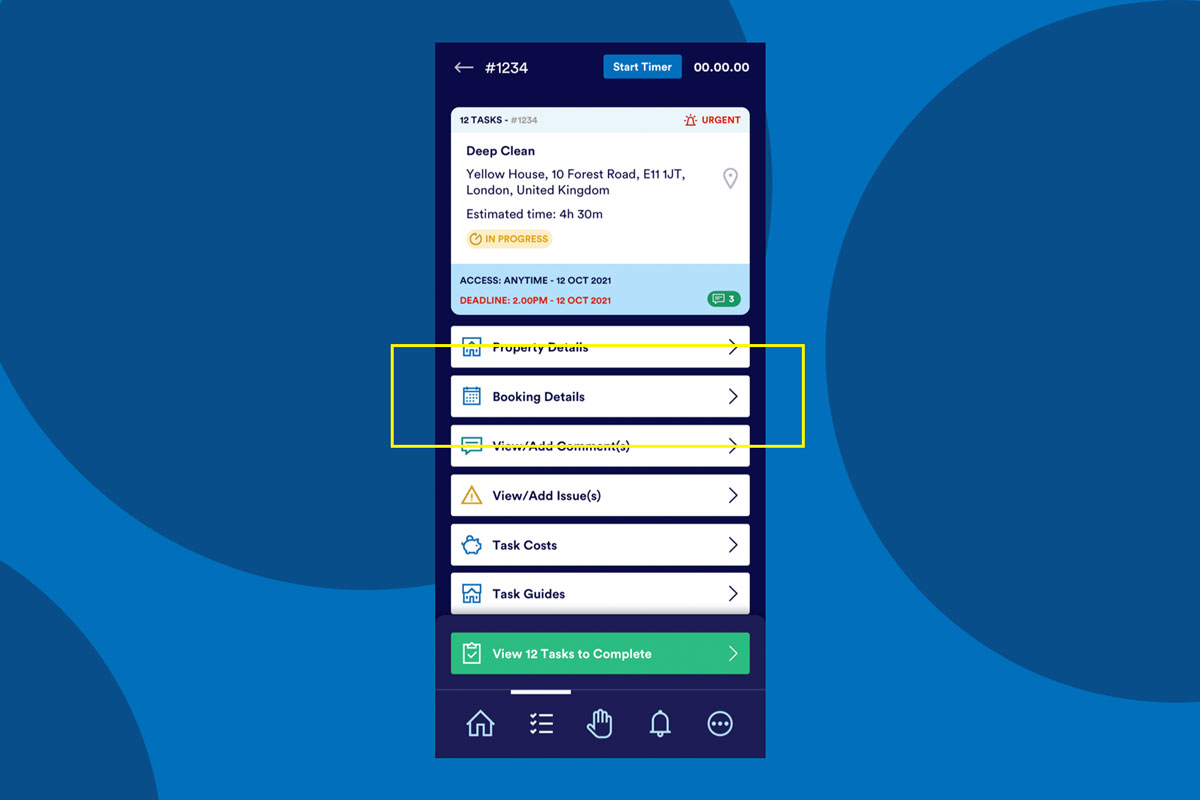
Selecting this will display a card containing the custom field data imported from Supercontrol.
When transitioning to this feature we recommend communicating with your housekeeping, inspection, maintenance and other task app using team members that this is a section of the Task App that they should be aware of to receive booking specific info. That way the user will know for all future tasks that this is a feature you have put in place.
For any questions on setting up and syncing Supercontrol fields, just get in touch with the YourWelcome support team or contact your account manager and we will gladly assist.