
🗣 Want to view this article in a different language?
Task Contents
Specific Details
Adding Tasks > Task Contents
Specific Details
Available for subscribers of: PropertyCare.com
Available to: Users with access to the dashboard with ability to create tasks.
For our power users there are additional features you can configure when creating a task or tasklist.
These ‘Advanced’ features are added inside an option called Specific Details when adding a task:
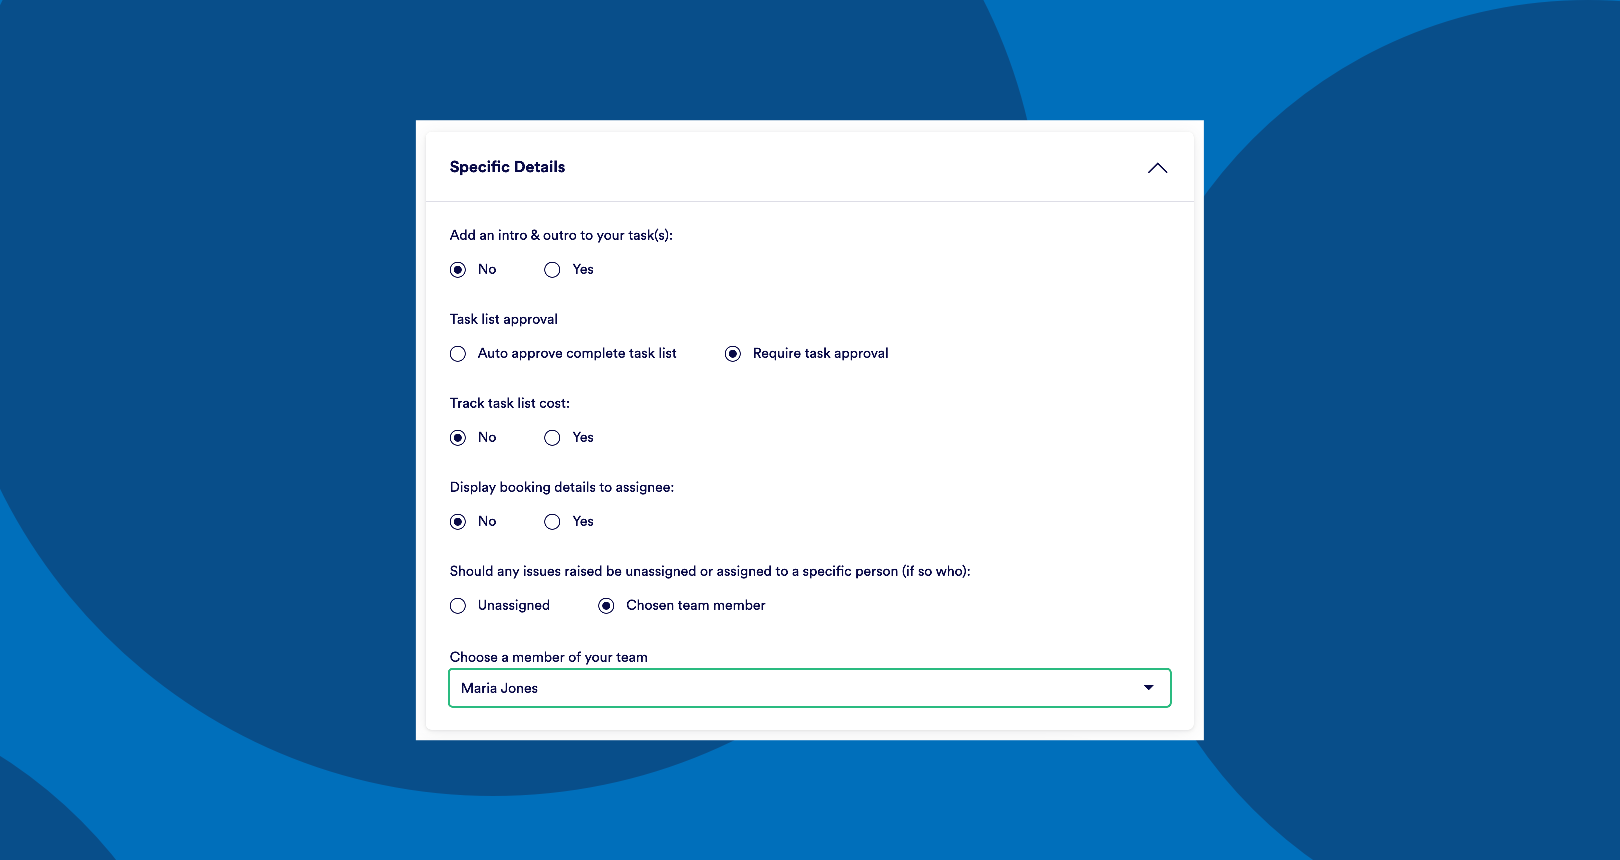
Clicking on the item will expand the box to display the various options, all by default will be set to ‘No’ however toggling any to Yes will display further variables to configure. Let’s look through each of them here.
Intro/Outro
You have the option of adding an intro or outro text to your task card. Both these fields are simply text boxes where you can insert any content you want. An example of uses for the intro text can be to explain more about why the task needs doing (ie not action points but context) or simply to warmly greet your task assignee. The intro is only displayed in the task app on the chosen task card (ie it is not on the main list view) but on the expanded task card view when selecting a task. Here are some examples of it in situ.
The outro text is displayed once all tasks are completed in the task app. Again this is just a free-text box so can be used for examples like thanking the assignee, prompting them to claim more tasks or confirming where to put the property key when vacating post-clean etc.
When adding your intro/outro text bear in mind that if your task card generates based on bookings (ie a turnover clean) the same outro message must fit all instances where the task applies (for instance if you were to use the Outro text to describe where to leave the key on exiting the building, it is not advisable to use specific locations to a single property (ie ‘Under the flower pot by the front door’) if the task is linked to bookings across multiple properties – of which only one has a flower pot by the front door!).
Task list approval
Rather than a Yes/No option this setting has 2 options:
auto approve complete task list Vs require task approval.
Across the dashboard we track many statuses to do with tasks to allow you to monitor their progress. These include Task Priority Status, Property Clean Status and the Task Status. The Task Status can be:
- Not started
- In Progress
- Finished
A tasklist which is Auto Approved when complete will have its status set to ‘Finished when the task assignee has ticked off all the tasks on their list. This requires no intervention and will happen as soon as the final item is ticked off.
A tasklist which requires approval will seem to the assignee exactly the same (ie completing the final item will display the Tasklist Complete modal etc) however the status will stay as ‘In Progress’ and an entirely new Single Task will be generated for a designated member of your team with just one task which is to approve (or sign-off) the tasklist requiring approval. This could be an inspectors role or just a housekeeping admin member to verify in someway. When the new task is marked as complete it will simultaneously update the original task status from In Progress to Finished.
Task list costs
The next option can be used to track the costs associated with a task. Selecting Yes on this item will display additional fields where you can add estimated costs for both Labor and Parts. You can opt to have the cost tracked as an hourly cost, daily cost or Per Task Card cost.
These estimates can be for internal purposes only and any reports will then use these figures to calculate costs OR you can use one of the additional options to select Yes to displaying the cost to your task assignee. By selecting to show the costs to your assignee they will then have an additional button option on the chosen Task page of the Tasks App where they can view the costs like this:

If opting to display the cost to your assignee you then have a final option where you can allow your task assignee to update the costs. Selecting Yes to this option adds a pencil icon to the displayed cost estimates which can be tapped to update (or add) costs for that line item.
The above options can be configured separately for labor or parts.
Displaying booking details
The sharing of guest details has become a contentious issue in recent months due to the various data protection regimes initiated across the globe. YourWelcome takes data privacy seriously and we don’t share unnecessary info without consent. This option allows the task creator to decide whether the task assignee should see any of the booking data and if so, what data.
Selecting Yes will allow you to select any/all of the following booking types:
- Prior Booking Details – this is useful if your tasklist assignment rules are linked to checkouts.
- Active Booking Details – this is useful if your tasklist relates to bookings that are mid-stay.
- Next Booking Details – this is useful if you base your tasklist assignment on check-ins)
You can then determine, for all of the selected booking types above, which data about those bookings to share.
Some examples where sharing booking data can be useful include:
- An annual service (ie smoke alarm detector check, swimming pool filter change or air conditioning unit clean) where the task due date is locked each year irrespective of whether you have a booking. You may prefer your designated task assignee to greet your guests by name on arrival to carry out the task to sound more professional and also give the guest comfort the activity was scheduled and not a random stranger attending the property.
- If you provide early check-ins to a property, you may want your housekeeping or inspection team to know how many people will be in the next booking to prepare the appropriate number of rooms but also be able to greet the guests by name on arrival if they are still completing the task when the guest arrives early.
- If your task assignee is responding to a guest call out (ie a broken item in the property), the assignee may need to call the guest for more details if they are not at the property so knowing the name and telephone number is required.
Enabling these items shows an additional button item on the chosen task page of the Tasks App. This will take the assignee to a page displaying 1, 2 or 3 additional cards (based on whether you have chosen Prior, Active and/or Next Booking details) with the appropriate info on.
We recommend assessing what information is required to share before enabling all of this info by default.
Task issue assignment
When using the Tasks App to complete tasks, if a task assignee has any problems they have the option to write a comment or raise an issue.
Read more about comments and issues on our Task App support page here. In summary raising an issue creates a new Task for a designated team member to review to decide how best to move forward.
By default the issue tasks are unassigned and thus the team member responsible for allocating tasks using the Staff Roster can attribute the issue task to the correct person. However if you have a specific person who manages the issues you.
Selecting Yes for this option in the Specific Details settings allows you to nominate who will receive the task should any issues be added. That person is typically an admin role in your business and in turn would triage the issue and create their own (one-off or recurring) task(s) for other team members or may choose to resolve the issue themselves depending on its severity.
If you have any questions about configuration options in any of the specific details or any other questions about task settings, get in touch with our support team and we’ll gladly help.

💬 If you have any questions, please reach out to your account manager or use our contact form here.